Showing posts with label Whimsical Designs. Show all posts

Wednesday, July 31, 2013

Whimsical Designs "Going Buggy" Challenge


This week over at Whimsical Designs we are "Going Buggy"!

I think I have been "Going Buggy" for a long time, LOL! My family would probable attest to that fact.  Anyway, that is the challenge this week. We'd like you to create a card or project and include an insect OR animal.

Our sponsor for this weeks challenge is QKR Stampede, and if you join in the fun you'll have a chance to win 5 digis of your choice!!!


For my card I inked up an "itty bitty" stamp by Unity. I went for a CAS look and just matted it with some black and gold paper. I added a little photo corner behind the matted image for some interest. Then I inked up two of Stephanie's sentiment stamps from her fabulous collection. On the "fluttering by" stamp I did a little masking so I could remove the word "hi". This stamp is from her Whimsical Fun Vol 1. The "Let's Celebrate" is from her Everyday Sentiments.


A nice little CAS card to Celebrate a birthday or almost any occasion.


Supplies used: card stock - vanilla, black, gold; stamps - Everyday Sentiments and Whimsical Fun Vol 1 by Whimsical Designs, All Hail The Queen Bee by Unity; ink - Tuxedo Black by Memento and Gold by ColorBox; photo corner punch - EK Success; rhinestone - BoBunny; Pop Dots.

The design team has some fun inspiration to share with you so please pop on over to Whimsical Designs to check them out and leave a little love for everyone!


Wednesday, July 24, 2013

Whimsical Designs "Pile It On" Challenge


Happy Hump Day all!!!

Did you enjoy playing in the "Favorite Colors" challenge last week? We have another fun challenge for you this week over at Whimsical Designs, and it is "Pile It On", create a card or scrapbook layout and include at least 3 layers of paper and 2 or more embellishments.

Our sponsor for this weeks challenge is The Paper Parade, with a chance to win a $15 gift certificate to the store!! Pretty neat!!!


For my card I layered some card stock with some fun patterned paper by Kaiser Craft, generously provided to me by The Paper Parade. I also stamped a darling elephant stamp by Kaiser Craft, also given to me by The Paper Parade, on some patterned paper so that I could fussy cut it out. For my embellishments I used some cute ribbon by SEI, a few brads, and a little flower which the elephant is holding in his trunk. My sentiment stamp is from Stephanie's With Love stamp set.


Altogether, it makes for a whimsical little card to let someone know you care!!


Supplies used: card stock - black, turquoise; patterned papers - Bop & Chuckle from Party Animal by Kaiser Craft; stamps - elephant by Kaiser Craft, sentiment in With Love by Whimsical Designs; ink - Tuxedo Black by Memento; brads - Making Memories; ribbon - Doodley-Doo Boy by SEI; flower - my stash; Pop Dots

Now pop on over to Whimsical Designs, for some fabulous inspiration by the super talented design team!!!


Wednesday, July 17, 2013

Whimsical Designs "Favorite Colors" Challenge


Hello all, and welcome to another fun challenge over at Whimsical Designs!

This week we are asking you to take your "favorite colors" and create a card or project. Easy, peasy right? We all like to work with our favorite color combination :)

Our sponsor this week is The Paper Parade and you can have a chance to win a $15 certificate to the store!!!! How cool is that?


I actually have several "favorite" color combinations and one of them is pink and teal. For my card I was able to work with some gorgeous papers by Authentique which were generously provided by The Paper Parade. I cut out the "Wild Flower Seeds" from the "Enhancements" paper sheet, in the Seasons collection, to use as my focal point. The background papers are "Spring One" and "Spring Two" from the same collection. I tied a pretty bow with some ribbon and added a cute flower button tied with twine. My sentiment is from Stephanie's Whimsical Fun Vol. 1


Such gorgeous papers make a pretty card to let your friend know how much she means to you!


Supplies used: card stock - vanilla, pink; patterned papers - Spring One, Spring Two and Enhancements all from Seasons by Authentique; ribbon - 3 Girl Jam; button - my stash; twine - Liz's Paper Loft Boutique; oval and scalloped oval punches - Stampin' Up; stamp - Whimsical Fun Vol.1 by Whimsical Designs; ink - Tuxedo Black by Memento; rhinestones - Kaiser Craft; Pop Dots.

The design team has some super projects to share with you so click on over to Whimsical Designs to check them out and then join in the fun with your "favorite color" combination!!!!


Wednesday, July 10, 2013

Whimsical Designs "Clean and Simple" Challenge


I hope everyone in the US enjoyed their July 4th weekend!!! We had a fabulous time at our annual trek to Donner Lake. The fireworks over the lake are the best ever!!! My 5 year old grandson sang "It's a Beautiful Night" from Lady and the Tramp, during the whole fireworks display. His own version as you may imagine. It was so cute, he just sang the whole time, he was so happy :)

Well, as it is Wednesday, it is time for a new challenge over at Whimsical Designs! This weeks challenge is "Clean and Simple", create a CAS card with minimum layers and embellishments.

Our sponsor for this weeks challenge is Crafty Sentiments. The winner will pick 3 digis of their choice!


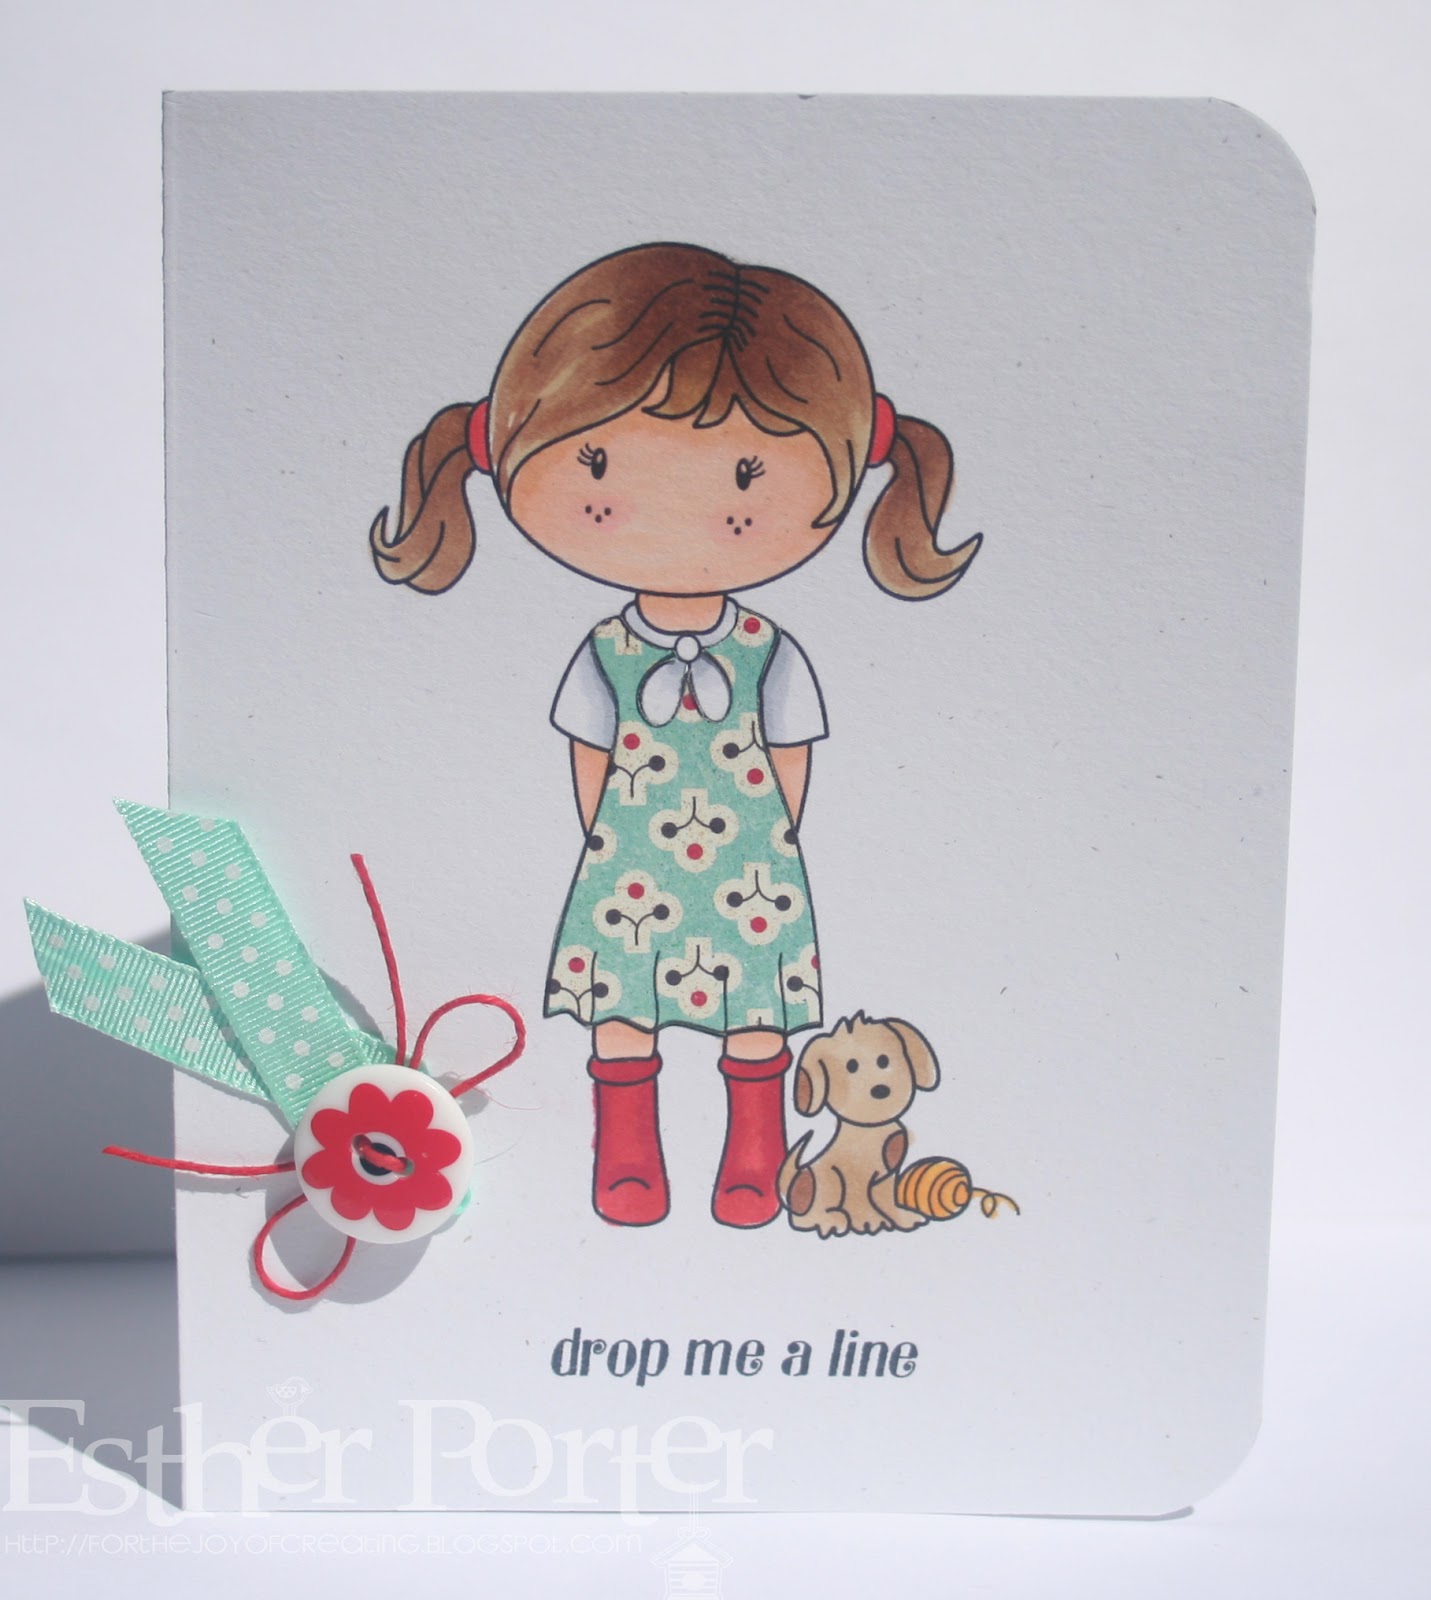
For my card, I used a darling image from Crafty Sentiments called Rose and Roxy. I printed my image directly on to my card base and also on to a piece of patterned paper so I could fussy cut her dress out. I colored her with Copic markers. My sentiment is from Stephanie's Everyday Sentiments


Since our card was to be CAS, I only added a little piece of ribbon and a button tied with twine to my image.


Supplies used: card stock - recycled white; patterned paper - Yumberry from Hello Luscious by Basic Grey; digital image - Crafty Sentiments Designs; Copic markers; ribbon - American Crafts; button - my stash; twine - Liz's Paper Loft Boutique; stamp - Everyday Sentiments by Whimsical Designs; ink - Tuxedo Black by Memento.

Now, stop by Whimsical Designs and peruse the CAS cards the design team has created! I hope you'll be inspired to play along with us this week!!!

Wednesday, July 3, 2013

Whimsical Designs "Christmas In July" Challenge


It's hard to think about Christmas when it is 105° outside! But...think cold because this week our challenge over at Whimsical Designs is "Christmas In July". Create a Christmas card or project.

Our sponsor for this weeks challenge is The Robins Nest, with a chance to win a Christmas package worth $25!!!


For my project I decided to use one of the new 3D ledge village cuts from Silhouette Studio! I used paper from Authentique to make my cuts. I decorated the tree and the house with stickers by Karen Foster. I used a little holly button for the door, I couldn't find a wreath small enough in my stash. I attached a Santa sticker to the front of the fence and a sign to the back. The sign arrows are also a Silhouette Studio cut file. The stamps are from Stephanie's Snow Much Fun!


I think it all makes a darling Christmas decoration for your ledge!!!!


Supplies used: patterned papers - Foundations Bi-Fold Solid Paper, Yearning and Curiosity all from the Wonder collection by Authentique; Silhoutte Studio cut files; stickers - Karen Foster and Sandylion Essentials; button - my stash; star - Jolee's; stamps - Snow Much Fun by Whimsical Designs; ink - Tuxedo Black by Memento

Now head on over to Whimsical Designs to feast your eyes on the fabulous design teams projects and then join us in this weeks fun challenge!!


Wednesday, June 26, 2013

Whimsical Designs "ATC" Challenge


Well, I have to admit that this was a new one to me!!

Our challenge this week at Whimsical Designs is to create an ATC project - should be 2.5" x 3.5"
If there is anyone out there who doesn't know what ATC stands for, it is Artist Trading Card.

Our sponsor for this weeks challenge is SK Digis, with a chance to win a $6 voucher to Sonja's store.


I thought I'd tell you a little bit about ATC's.

ATC's are miniature works of art about the same size as modern trading cards, baseball cards, or 21⁄2 by 31⁄2 inches, small enough to fit inside standard card-collector pockets, sleeves or sheets. The ATC movement developed out of the mail art movement and has its origins in Switzerland. Cards are produced in various media, including dry media (pencils, pens, markers, etc.), wet media (watercolor, acrylic paints, etc.), paper media (in the form of collage, papercuts, found objects, etc.) or even metals or fiber. The cards are usually traded or exchanged.

Before I created my ATC I browsed Pinterest to get some ideas of what others are creating. I decided to start with a vintage image which I downloaded from The Graphics Fairy. This web site is an awesome source for free vintage and retro images.

I cut a piece of chipboard, to the correct size, for the base of my ATC. I then covered it with patterned paper and rounded the edges with my trusty Zutter corner rounder.

I then attached my image and got to work creating my collage. I used different rhinestones, a vintage charm, jewelry findings, etc to adorn her.

I trimmed the picture with some vintage gold trim. and cut the roses from some vintage paper.

To finish it off I stamped some vintage binder paper with Stephanie's "Unique" stamp from her Whimsical Fun Vol. 1.


What a fun project and I enjoyed expanding my horizons.


Supplies used: chipboard; patterned paper - Dragonfly Duet In Botanicabella by graphic 45; vintage binder paper, gold trim and charm - Jenni Bowlin; rhinestones - BoBunny and Kandi Kane; jewelry finding, vintage rose paper - my stash; stamp - Whimsical Fun Vol. 1 by Whimsical Designs; ink - Vintage Photo Distress Ink by Tim Holtz for Ranger; corner rounder - Zutter; Pop Dots.

If you haven't ever made an ATC before, I hope you'll expand your horizons and join in the fun over at Whimsical Designs!! The DT has some great inspiration for you so please stop by the blog and check it out!!!


Wednesday, June 19, 2013

Whimsical Designs "Getting Patriotic" Challenge


Hooray for the Red, White and Blue!!!!!

This week in celebration of the upcoming 4th of July holiday, we are "Getting Patriotic" over at Whimsical Designs. Create any project and use the colors red, white, and blue.

Our sponsor for this weeks challenge is Eureka Stamps with the winner able to choose 5 digis from the shop!!!!


For my card I used #19601 Liberty Balloon Holder, which you can purchase here. I printed her twice, once on Copic blending paper and once on patterned paper for her dress. 

After coloring her and paper piecing her dress, I attached her to a piece of red card stock. I punched two tiny holes, above and below her hand, so that I could run a stick pin through. Now she can hold my sentiment banner attached to a star stick pin. 

My sentiment is from Stephanie's Whimsical Fun Vol 1, one of my favorite "go to" sentiment stamp sets!!!


A couple more sheets of patriotic patterned paper attached to my card base, some "Glory Days" ribbon from my stash, and my image attached with Pop Dots and my card is finished.


Supplies used: card stock - white, red; patterned papers - Liberty Stars, Silver Stars, and Glitter Bursts all from Freedom by Reminisce; digital image - Eureka Stamps; Copic markers; Pebbles chalk; sentiment stamp - Whimsical Fun Vol 1 by Whimsical Designs; ink - Tuxedo Black by Memento; stick pin - Little Yellow Bicycle; ribbon - my stash, Pop Dots

The design team has some fun patriotic projects to spark your creative mojo, so hop on over to Whimsical Designs and lets get this party started!!!!!


Wednesday, June 5, 2013

Whimsical Designs "Vintage" Challenge


This week over at Whimsical Designs we are going "Vintage"

Our challenge this week is to create a project with a vintage feel. So get that shabby chic mojo flowing and come and join us with your old fashioned creation.

Our sponsor for this weeks challenge is Scrapping Memories and the winner will receive 5 files of their choice!!


For my card I picked some papers by Authentique and 7 Gypsies. I sewed some lace to one of the papers and did some inking, some layering and some more sewing. I topped it with a vintage frame by Melissa Frances and put a pretty little epoxy sticker by SEI, tied with a bow, inside the frame. Added a couple vintage buttons tied together with twine. For the finishing touch I stamped one of Stepahnie's sentiment stamps from her Everyday Sentiments set.


Supplies used: card stock - blue; patterned papers - Clean and Clear from Fresh by Authentique, Orchestra by 7 Gypsies; ribbon and lace trim - Michaels; Vintage Frames by Melissa Frances; twine - Liz's Paper Loft Boutique; epoxy sticker in Lovebirds by SEI; stamp - Everyday Sentiments by Whimsical Designs; ink - Tuxedo Black by Memento and Cocoa by ColorBox; sewing machine.

Now please head over to Whimsical Designs and take a look at all of the beautiful "Vintage" creations the design team has come up with!!

Also take a look at the Book Of the Month challenge we are starting this month!!! If you like to read, this will be a fun challenge for you:) Hope you'll join us!!!!


Wednesday, May 29, 2013

Whimsical Designs "Recycle It" Challenge


Happy Wednesday all!!!

This week over at Whimsical Designs we are stampin' out our carbon footprint (haha) by recycling!
The theme is to "Recycle It", create any project and use something you would normally throw out.

Our sponsor for this weeks challenge is Inky Impressions with a $10 gift certificate to their store up for grabs!!


I used a darling image by Inky Impressions, called Birthday Girl, for my card. I colored her with Copics and did a little paper piecing, using Vintage T papers, for her jeans and vest. I fired up my Cameo and cut out a park bench and some grass. I recycled a couple of coffee stir sticks for the posts the banners are on and stamped them with two darling sentiments from Stephanie's Everyday Sentiments.


Supplies used: card stock - vanilla, 2 shades of green, brown, black; patterned papers - Vintage-T 6x6 paper pad by We R Memory Keepers, Barefoot Stripe in Barefoot by BoBunny; digital image - Inky Impressions; Copic markers; stamps - Everyday Sentiments by Whimsical Designs; ink - Tuxedo Black by Memento; coffee stir sticks; Silhouette Studio cut files; Pop Dots.

The design team has some fabulous ideas to spark your creativity and give you some "recycling" ideas so head on over to Whimsical Designs to check them out!!!


Wednesday, May 22, 2013

Whimsical Designs "Song Inspired" challenge


Happy Wednesday everyone!!!

Time for a new challenge over at Whimsical Designs. This week we are asking you for a "Song Inspired" creation. So get out your ipod, listen to some tunes, and let the music inspire your crafting mojo!!!

Our sponsor for this weeks challenge is 3 Girl Jam and the prize is a $15 certificate to their store!


For my project I chose one of my favorite songs "He Ain't Heavy, He's My Brother". I love the version by The Hollies the best, although "The Osmonds" did a great job also. I just love the lyrics to this song.

  
Hollies
He Ain't Heavy, He's My Brother lyrics
(B. Scott - B. Russell)

The road is long
With many a winding turn
That leads us to who knows where
Who knows where
But I'm strong
Strong enough to carry him
He ain't heavy, he's my brother

So on we go
His welfare is of my concern
No burden is he to bear
We'll get there

For I know
He would not encumber me
He ain't heavy, he's my brother

If I'm laden at all
THEN I'm laden with sadness
That everyone's heart
Isn't filled with the gladness
Of love for one another

It's a long, long road
From which there is no return
While we're on the way to there
Why not share

And the load
Doesn't weigh me down at all
He ain't heavy, he's my brother

He's my brother
He ain't heavy, he's my brother


Originally my thought was to use a silhouette of one brother giving another a piggyback ride, but after much searching I could not come up with an image at the Silhouette store, on any of my Cricut cartridges or online (without paying $$$). So my second idea came to me when I saw an image of a gril pushing a wheelbarrow of flowers in my "A Childs Year" cartridge. Then I found another image of a little boy sitting on a stool, holding a teddy bear. I welded the two images together and came up with the following card.


Supplies used: card stock - white, black; patterned papers - Flowering Vine by Heidi Swapp and Palmetto in Poppy by SEI; A Childs Life Cricut cartridge; rhinestones - Kaiser Craft; sequins and metal flower - my stash.


Please head over to Whimsical Designs to see what the rest of the design team has come up with!
And... come a play with us on this fun "song Inspired" challenge.


Monday, May 20, 2013

Yummo!


I hope all my friends out there had a fabulous weekend!!!

I had a productive one and managed to get all my pots in the front and back yard planted :) Now it looks so pretty!

I'm sharing a card this morning which I made for two challenges.

The first is Less Is More and the theme this week is Cats and/or Dogs.


The second is Case This Sketch.


For my card I inked up a couple of cute stamps I had by We R Memory Keepers and a fun Sentiment from Whimsical Designs! I stamped the kitty twice, once on patterned paper so I could fussy cut him out. I had to add a couple of google eyes for fun.


Supplies used: card stock - recycled white; patterned paper - Lazy Time in Friends Furever by We R Memory Keepers; stamps - Meow in Friends Furever by We R Memory Keepers and sentiment in Whimsical Fun Vol. 1 by Whimsical Designs; ink - Tuxedo Black by Memento; google eyes - JoAnn's; Pop Dots.


Wednesday, May 15, 2013

Whimsical Designs "Mix It Up" Challenge


Last week, at Whimsical Designs we asked you to "Alter It" and we received some fabulous entries!!! This week we are asking you to "Mix It Up", create any project and use some type of mixed media.

Our sponsor for this weeks challenge is Tabitha's Designs and you can have a chance to win 2 digi paper packs of your choice!!


For my project I started with a small canvas. I purchased a digital image at A Day For Daisies of a girl flying a kite. I printed her on a peachy colored card stock and on a page I had torn from a thrift store book. I used green floss to hand stitch some grass. I attached her and her hair to the canvas using Modge Podge. I cut her dress from a scrap piece of material I had and glued small sections of it to the canvas so that it would look like the wind was blowing it. Her kite was printed on patterned paper, fussy cut, glued to the canvas along with some twine for the kite string. I also covered the kite with glossy accents. I stamped the sentiment using Stephanie's Whimsical Fun Vol.1. I punched 2 tiny butterflies out and glued down their bodies only. As a finishing touch I sprayed the whole thing with Perfect Pearls mist.


Supplies used: canvas; card stock - peach; page of a book; scraps of patterned paper; scrap of material; green floss; twine - Liz's Paper Loft Boutique; butterfly punch - Fiskars; stamp from Whimsical Fun Vol 1 by Whimsical Designs; ink Jet Black by Archival; Modge Podge; Perfect Pearls Mist.

Now, please, head on over to Whimsical Designs and take a look at what the Design Team has come up with for inspiration!!!

Wednesday, May 8, 2013

Whimsical Designs "Alter It" Challenge


Happy Wednesday all!!

Midweek and time for a new challenge over at Whimsical Designs! For this week we are asking you to "Alter it". Create an altered project. We have some fabulous inspiration for you over at the blog so I hope you'll pop on by and browse through the Design Teams projects.

The sponsor for this weeks chalenge is V's Sweet Ideas and you will have a chance to win a $10 gift certificate to the store!!


I pondered for quite some time on what to do as a project for this challenge. I finally settled on altering an Altoids tin. 

I started by removing the lid. I then covered the inside and outside with some scraps of patterned paper I had in my stash. I fussy cut out a mermaid from a page of ephemera I had and attached her with pop dots. I  die cut some seaweed, with my Cameo, in 2 different shades of green. I attached a couple of them flat on the back of the tin and a couple with pop dots. Then I went about gluing shells, pearls, jewels, coral and sand to the bottom using Glossy Accents. I pulled out my Crop-A-Dile and punched a hole through the top of my tin, so I could put a stick pin through it. I decorated the stick pin with pearls, crystals, a silver shell and attached a silver seahorse charm. I glammed everything up a bit with some Stickles. I tied some tulle and fringe around the outside. For the stand I glued some little wooden knobs to a small wooden spool and painted it with aqua acrylic paint, then over the top of that I applied Antique Silver Glitter paint. When dry, I hot glued it to the bottom of my tin. I cut a tiny banner out with my Cameo and stamped it with one of Stephanie's sentiments from her Whimsical Fun Vol. 1


Supplies used: Altoid tin, card stock - recycled white, vanilla, 2 shades of green; patterned paper - scraps from my stash; mermaid ephemera; Silhouette Studio cut files; stamp - Whimsical Fun Vol. 1 by Whimsical Designs; Turquoise and Clear Stickles; shells, coral and sand from my beach trips; pearls, jewels, crystals, charms from my jewelry stash; tulle, trim, wooden spool and wooden knobs - JoAnn's; Aqua acrylic paint by Folk Art and Antique Silver Glitter acrylic paint by Martha Stewart; Glossy Accents; Pop Dots; Hot Glue and Hot Glue Gun.

Now head on over to Whimsical Designs!!!


Wednesday, May 1, 2013

Whimsical Designs "Bling" Challenge


Everyone loves a little sparkle now and then, and that's what we're asking you to do for this week's challenge over at Whimsical Designs, create a project using "bling".

We have a fabulous design team who have some wonderful creations to share with you and inspire you, so please stop by the blog and leave them a little love.

Our sponsor this week is Paper Nest Dolls!!! They have some darling digital images you'll just fall in love with. The prize you can win is 3 Copic markers of your choice and, better yet, if you use a Paper's Nest Dolls image in your creation you can win 5 Copic markers!!!!!!

For my card I used Lightening Bug Ellie and the sentiment You Light Up My Life, both from paper Nest Dolls, along with one of Stephanie's stamps "Love Bug" from her stamp set With Love.
I printed out my digital image 3 times - on the star background paper, on white blending paper and on the flower patterned paper so that I could fussy cut out her dress. After I finished coloring her and attaching her dress I fussy cut her out and used pop dots to attach her to the background paper.


I added my bling by using yellow Stickles on all the fireflies and attaching rhinestones to the centers of the stars.


Supplies used: card stock - white; patterned papers Pixie from Magic Happens by Kaiser Craft and Fiction 6X6 paper pack by Basic Grey; digital image and sentiment from Paper Nest Dolls; Copic markers; stamps - With Love set by Whimsical Designs; ink - Tuxedo Black by Memento; Curved Rectangles Nestabilities by Spellbinders; yellow Stickles; rhinestones - Kaiser Craft and Kandi Kane; Pop Dots.

Now stop on over at Whimsical Designs and be prepared to be wowed!!!!

Wednesday, April 24, 2013

Whimsical Designs "A Little Sketchy" Challenge


Happy Wednesday everyone, time for a new challenge at Whimsical Designs!

Also Stephanie is having a DT call for Whimsical Designs, if you are interested in joining the Whimsical Designs team see the blog for all the details!!!!!

This week we have a sketch challenge for you, create a card or a scrapbook layout using this sketch:


Our sponsor for this week's challenge is Whimsy Stamps, winner will receive 5 digis of their choice!!


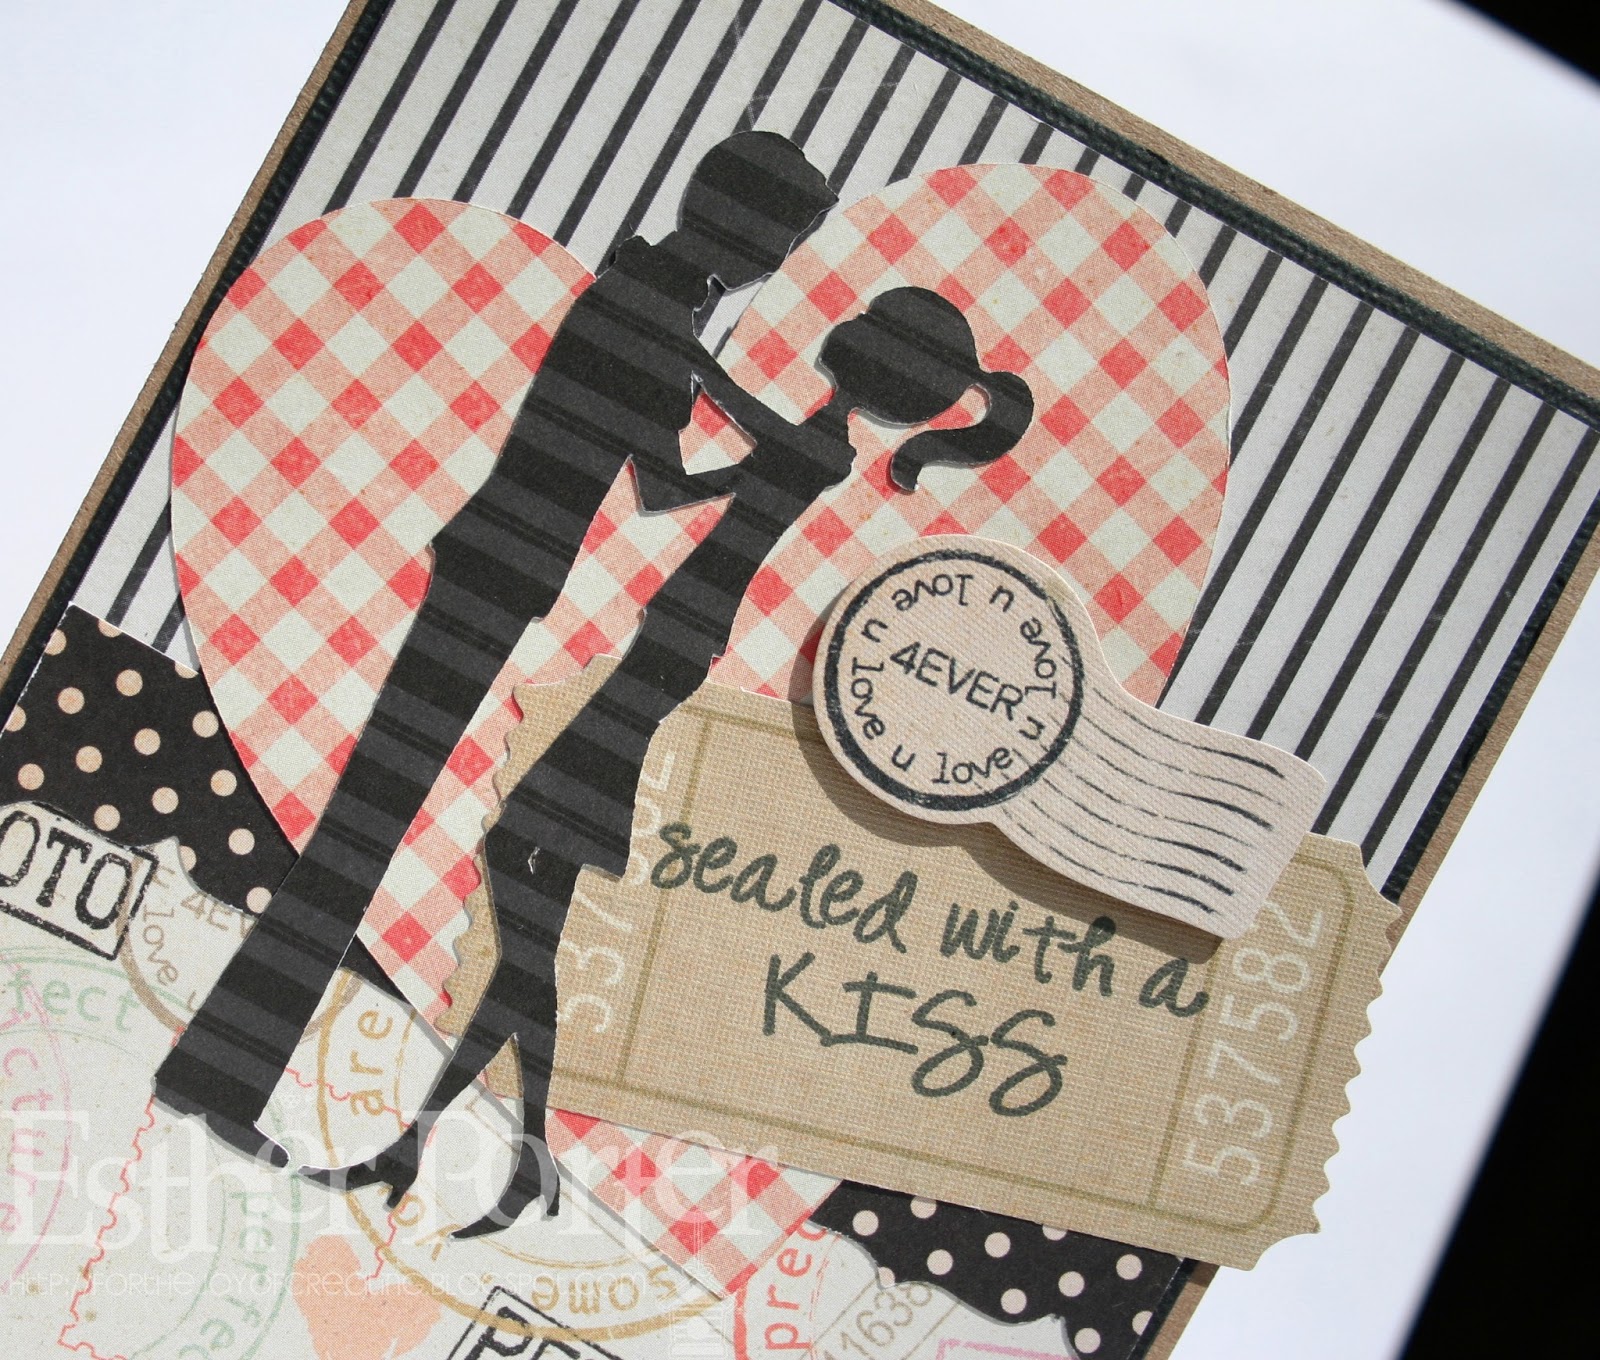
For my card I choose to use the Sweethearts Cricut cartridge to cut out my heart and my silhouette. I stamped my sentiment on the ticket using Stephanies With Love stamp set which you can purchase here.


Supplies used: card stock - kraft, black; patterned papers - Gerber Daisy, Shuffle, Bird Cage, and Headed South in It's The Little Things by Fancy Pants; design embellishments in It's The Little Things by Fancy Pants; stamp from With Love by Whimsical Designs; ink - Tuxedo Black by Memento; border punch - Fiskars; Sweethearts Cricut cartridge; Pop Dots.

I hope to see you link with us! Please head on over to Whimsical Designs and look at the design teams fabulous interpretations of our sketch and leave them a little love while your there.